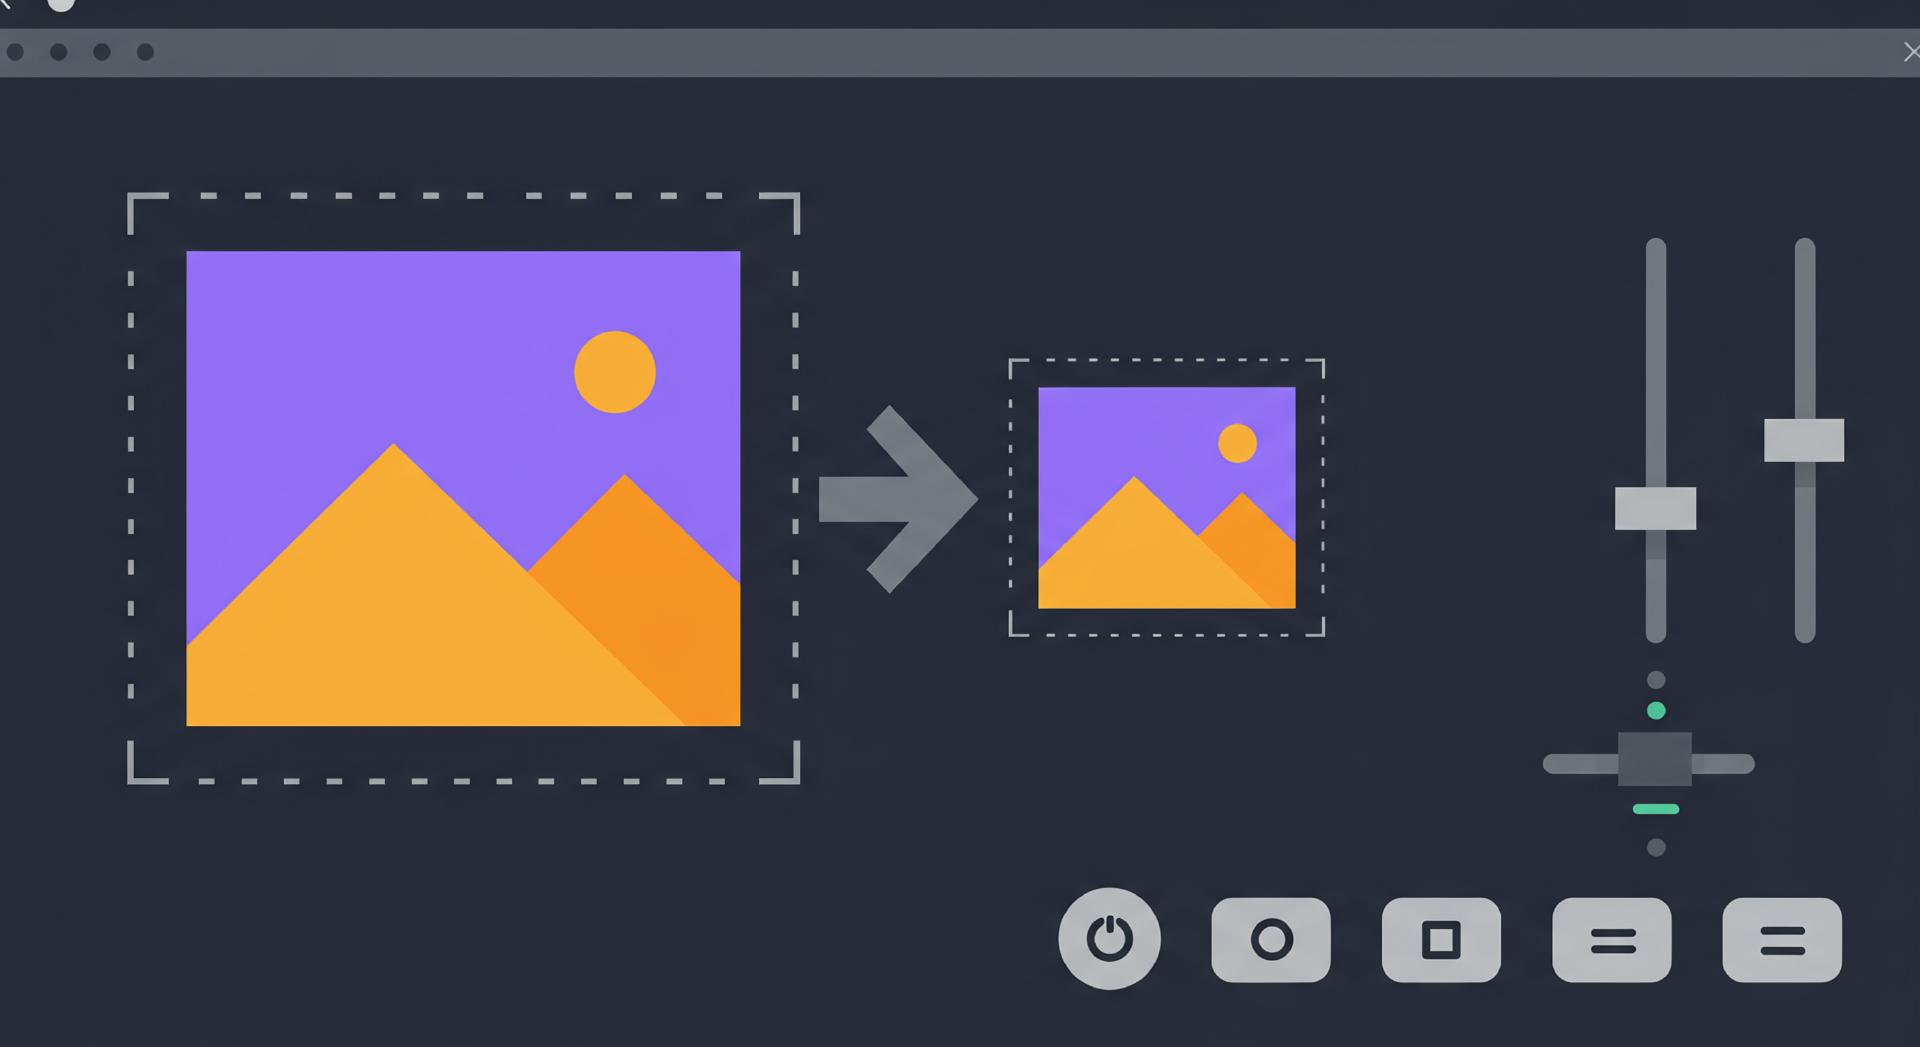
Every website faces the challenge of needing to resize images at times.
Having large image files can be problematic.
What’s the issue with large files?
With the recent advancements in smartphone specifications, smartphone cameras have also tremendously improved.
For instance, Samsung has started to integrate 200MP camera sensors in their smartphones, and a photo taken like this is usually around 13MB (I just took a photo with my Galaxy phone).
To be honest, having one or two large files is not a significant issue. However, modern web pages consist of numerous images, and if all files on a page are 10MB or 20MB, it completely changes the scenario. (Even 3MB can be quite large.)
Typically, images are stored on a server, whether that be a file server or a CDN, and image files need to be sent from the server to the client.
Let’s assume a page has 100 images, each being 10MB. To view one page, 1GB of data must be transmitted.
Do you think it’s not a big deal these days since internet speeds have exceeded gigabits? With my 1GB internet, it theoretically takes 10 seconds.
Of course, it’s rare to use 100 high-capacity images like this.
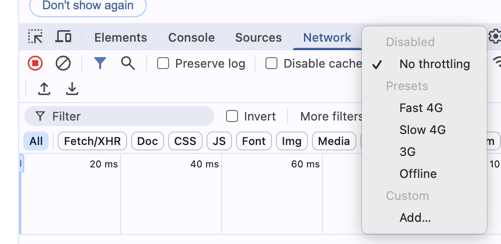
The problem is that even though internet performance has improved, there are still many areas where it’s slow, and unlimited data plans are still uncommon. The reason various browsers have a Throttling option in their developer tools is likely because there are still many areas with slow internet speeds.
Therefore, for cases where rendering speed slows due to file size, people often perform the following methods to reduce image size.
1. Change Image Format
This involves converting the image format, that is, the file extension. Common formats used on the web include jpg, png, and webp.
Among these, png is particularly poor in compression, so it tends to have larger file sizes compared to other formats, even with the same dimensions and quality.
2. Reduce Image Size
This involves reducing the dimensions of the image. For example, if you reduce an image from 1920x1080 to 960x540, the file size decreases to 1/4.
3. Reduce Image Quality
This is the process of lowering the image quality. Generally, it means increasing the compression rate. Lowering quality will reduce file size but also decrease the quality of the image.
If an image doesn’t necessarily need to be highly sharp, then lowering its quality is also a viable option.
In Hugo
Fortunately, Hugo provides built-in functions for reducing image size.
The current site is built on the Hugo Template Engine, and at first, I didn’t know any better. Uploading uncompressed original photos caused the site rendering to take about 1 to 2 seconds.
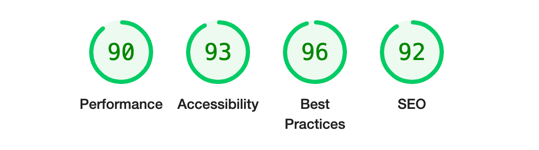
In Google Lighthouse, the score fell below 50, making it one of the worst-performing sites.
In my search, I discovered that Hugo allows image conversion via built-in functions, and applying this reduced my site rendering time to under 1 second.
The Lighthouse score also significantly improved to 90. (Based on Desktop)
This post will detail how I drastically reduced the image rendering time on this page.
0. Importing Images
There are two main ways to import images:
the first is to bring them from the assets path, and the second is to import them from the user’s content directory.
Importing Images from Assets
To import images from within assets, you can use the built-in function resources.Get.
1. Assigning an Image
{{ $image := resources.Get "images/some_image.png" }}
<img src="{{ $image.Permalink }}" alt="Image">
This assigns the image to a variable called $image, which you can use to render the imported image.
2. Using With
{{ with resources.Get "images/some_image.png" }}
    <img src="{{ .Permalink }}" alt="Image">
{{ end }}
Using with allows you to render the image only if it exists. You can also omit internal parameters (in the first method, you had to use the assigned variable $image).
Importing Images from Content
To import images within content, you can use the built-in function .Resources.GetMatch. Since it’s a method of the page object, if you want to use it within with, use $.Resources.GetMatch, or assign the page object to a variable separately.
1. Assigning an Image
{{ $image := .Resources.GetMatch "some_image.png" }}
<img src="{{ $image.Permalink }}" alt="Image">
2. Using With
{{ with .Resources.GetMatch "some_image.png" }}
    <img src="{{ .Permalink }}" alt="Image">
{{ end }}
What About Static?
Unfortunately, there is no method provided for fetching images from the /static directory, which is commonly where users include images.
There are cases where you can bind /assets to the /static directory and use resources.Get, but since it’s not feasible to use /assets, this option cannot be highly recommended.
References: https://discourse.gohugo.io/t/the-base-path-for-resource-get/12823/9
1. Image Resizing
In the following explanations, I will describe image retrieval functions based on the ContentDir and will use the with method.
You can tailor variable assignments according to your environment, or if the image is within assets, use resources.Get as described above.
{{ with .Resources.GetMatch "some_image.png" }}
    {{ with .Resize "300x500" }}
    <img src="{{ .RelPermalink }}" alt="Image">
    {{ end }}
{{ end }}
This allows you to render an image resized to 300x500.
If you want to maintain the aspect ratio and only change the width to 300, change 300x500 to 300x. To maintain the height while resizing, set it as x500.
2. Change Image Format
{{ with .Resources.GetMatch "some_image.png" }}
    {{ with .Process "jpg" }}
        <img src="{{ .RelPermalink }}" alt="Image">
    {{ end }}
{{ end }}
This renders the image converted from some_image.png to jpg format.
3. Resize, Change Format, and Adjust Quality All at Once
No specific function for just altering image quality is provided. However, you can adjust quality while resizing at the same time.
{{ with .Resources.GetMatch "some_image.png" }}
    {{ with .Resize "300x500 jpg q50" }}
        <img src="{{ .RelPermalink }}" alt="Image">
    {{ end }}
{{ end }}
In the example above, some_image.png is resized to 300x500, converted to jpg, and its quality adjusted to 50.
+ɑ Crop, Rotate, Apply Filters
Apart from resizing images, cropping, rotation, and filtering can also be performed. However, these actions do not greatly contribute to reducing image size, so they will not be addressed in this post.
If you’re curious, refer to Image Processing for more details.